Adding Git and Tests
In this post we will initialise a Git repository and add unit tests to an existing Kotlin and Gradle project.

Having used IntelliJ to generate a basic Kotlin, Hello World project and described the layout for the project, it is now time to place the code under source control management and get the unit tests working. These steps can be done for any existing code you have built in the past using Kotlin and Gradle and can be adapted for most JVM based projects.
Creating a Git Repository
The first thing that I do after creating a project is to place the folder under source control using Git. Even for small applications or when I am just playing with a new library, tracking changes helps my development process. I never have to worry when doing a major refactor as I can revert to an earlier version if necessary. Assuming you have the Git command line tool installed, initialise a repository with this command on the terminal:
git init
IntelliJ supports most source version control systems. If the git command is not available at the terminal, you can use IntelliJ’s UI instead as follows from the VCS toolbar menu.

Multiple version control systems are supported but Git is my favourite and is becoming ubiquitous.

Typing git status will show that there are untracked files in the repository that need to be added and committed. Before adding these files, I usually add configuration that tells Git which files or folders to ignore. You can create the file .gitignore using IntelliJ in the root folder of the project and add the following as contents:
.gradle/
.idea/
build/
To add all files and folders (excluding those we just added to the ignore file) to the repository use the command git add . and then commit them using git commit -m "initial project". IntelliJ can also do this. Right click on a file or on the entire project in the Project tool window and select one of the options from the Git sub menu.

Adding Tests
The project has no tests yet. We can add a file called MainTest.kt to the folder src/test/kotlin but none of the test annotations (either from JUnit or Kotlin Test) will work and Gradle cannot run the tests. First we need to add configuration to build.gradle.kts. The project has no dependencies yet, so the following creates that structure and adds kotlin.test as a dependency.
dependencies {
    testImplementation(kotlin("test"))
}

tasks.test {
    useJUnitPlatform()
}
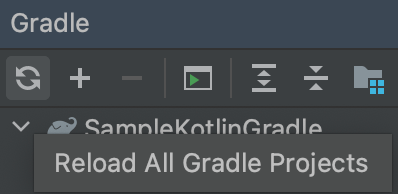
Having added this configuration, the project needs to be rebuilt to download the required dependencies; this can happen automatically depending on how IntelliJ is configured. If in doubt click the button on the Gradle tool window tool bar to “Reload All Gradle Projects".

Add a simple test class with one test function to prove that everything is working as follows. This should be placed in the src/test/kotlin/ folder within the project.
import kotlin.test.Test
import kotlin.test.assertTrue

class MainTest {
    @Test
    fun `should demonstrate tests config is working`() {
        assertTrue(true)
    }
}
The tests should now compile and run with a single passed test. Tests are run as part of the overall project build, but they can also be run in IntelliJ by clicking on the green icon in the margin beside of the editor, for an individual test or for the whole class, and selecting either the run or debug options.

Commit the files to the local Git repository with git commit -a -m "adding tests". Note that you can add and commit with one step using the -a switch to add every changed or untracked file.
Start Coding
The project is now ready so start developing your application. I covered how to use Test Driven Development in an earlier post, so remember to start by writing a test. Implementation and tests should be written in lock-step to make sure that you achieve good test coverage and write testable functions and classes.
In the last post we looked at creating a Kotlin project using Gradle by using the built in templates available in IntelliJ. We examined the file and folder structure, which uses conventions for where code and build files go, and saw how following the conventions keeps the configuration required to a minimum.
In this post, we initialised a Git repository locally to track changes, and added a .gitignore file to avoid placing some of the folders under source control. Finally we added the Kotlin test dependency and added a basic test to show that the tests are running correctly.
Most of these steps can be done to existing projects. My advice: always use source control, even for minor coding projects, and always code using Test Driven Development.
