Posting With Flask WTForms
The application does not do much at the moment. In this post we will add a form to the Agile Estimation application to allow a user to pick a nickname.

The application does not do much at the moment. In this post we will add a form to the Agile Estimation application to allow a user to pick a nickname.
To do this we will use another Flask extension, flask-wtf. It needs to be installed in the virtual environment with pip install flask-wtf and also added to the development and production requirement files.
The application will need a new property, SECRET_KEY, at this point which is used to prevent Cross Site Request Forgery (CSRF) attacks. The code creates tokens with a cryptographic signature generated using the secret. Should anyone gain access to the secret key you are using, it could allow them to attack your site.
For the moment, since we are in the development phase of the project, the key does not have to be so secure. It can be added to config.py. Here I’ve added it to the development and test configurations. In production we will use a different strategy to protect the key as it should not appear in source control.
class DevelopmentConfig(Config):
	DEBUG = True
	SQLALCHEMY_DATABASE_URI = 'sqlite:///' + os.path.join(base_dir, 'data.sqlite')
	SECRET_KEY = 'Temporary not-very-secret key'

class TestConfig(Config):
	TESTING = True
	SQLALCHEMY_DATABASE_URI = 'sqlite:///:memory:'
	SECRET_KEY = 'Temporary not-very-secret key'
Forms
The new package allows many short cuts to creating forms on your website. No need to wrestle with the HTML, simply add an object that extends FlaskForm, add attributes and return it to with the rendered template.
Here is an example form that will allow the entry of a nickname, giving the text to prompt the user with and a button to submit the form to the server.
from flask_wtf import FlaskForm
from wtforms import StringField, SubmitField
from wtforms.validators import DataRequired

class NickNameForm(FlaskForm):
    name = StringField('Please enter a nickname', validators=[DataRequired()])
    submit = SubmitField('Submit')
Adding it to a template is easy by using a bootstrap template and a wtf function. Here I’ve added it to the index.html file:
<div class="container">
	{% import "bootstrap/wtf.html" as wtf %}
	{{ wtf.quick_form(form) }}
</div>
The controller has to create an instance of the form and return it with the template so that it can be rendered on the web page. First import the form, instantiate it, and then return it with the template:
form = NickNameForm()
return render_template('index.html', form=form)
By default it will try to post this to the same URL that received the request. This is how WTF renders the form:
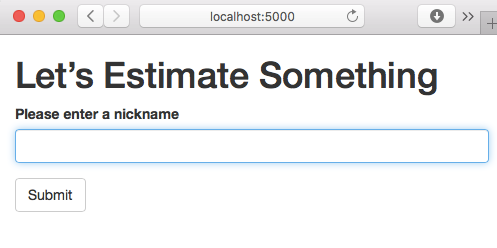
It does this by generating a block of HTML as follows:
<form action="" method="post" class="form" role="form">
  <input id="csrf_token" name="csrf_token" type="hidden" value="ImExZjUyMmExNzA2ZDdmZDIyZTA2NzU2NTUyMTBiNjBmMzQxOWQ3N2Ei.DzNqdQ.lC5MRIIeeSvy9whG7ePW9tO4xcc">
	<div class="form-group  required">
		<label class="control-label" for="name">Please enter a nickname</label>
		<input class="form-control" id="name" name="name" required type="text" value="">
	</div>
    <input class="btn btn-default" id="submit" name="submit" type="submit" value="Submit">
</form>
The hidden csrf_token in the form which is used to prevent CSRF attacks. Note that this is not encrypted; the value contains both data and a cryptographic signature. Without knowing the secret key, it would not be possible to create the signature. Flask can validate that the request is valid, and that the values have not been manipulated by comparing the signature to one only it can generate.
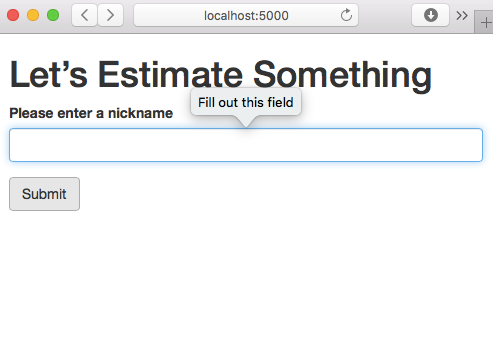
Additionally WTF adds validation to the form. If the submit button is pressed with no value in the text field, then a warning is presented to the user. The validators=[DataRequired() attribute achieves the following warning when the submit is clicked without any text entered.
Accepting a Post
This does not do much at the moment beyond validating the input since there is no controller method to accept a post from the form. I will add another function that responds to the / route, but this time for the POST command. Another approach is to use one method that accepts both and uses an if statement to decide on what behaviour to apply.
The method to accept a nickname is going to return back to the same page for now (I’ll redirect rather than render the template directly later, see further down) but this time with a new variable nickname that has been set to the value entered in the form.
@web.route('/', methods=['POST'])
def accept_nickname():
	form = NickNameForm()
	if form.validate_on_submit():
		nickname = form.name.data
		form.name.data = ''
	return render_template('index.html', form=form, nickname=nickname)
To use the new variable in the index page, I also need to set it in the hello function. I can set it as follows: nickname = None. Otherwise it will not be possible to check it. To display on the page I can use an if block directly in index.html:
{% if nickname %}
	Hello {{ nickname }}.
{% endif %}
Now a little welcome appears on the screen above the form.
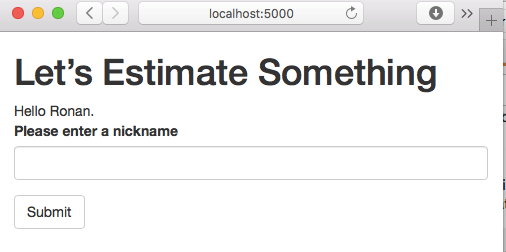
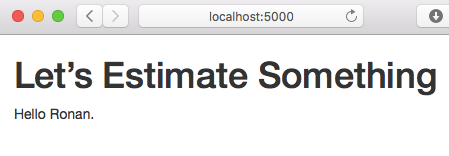
There is no need to include the form again if the user has already entered a nickname. To hide, use the else part of an if statement:
{% if nickname %}
	Hello {{ nickname }}.
{% else %}
	{% import "bootstrap/wtf.html" as wtf %}
	{{ wtf.quick_form(form) }}
{% endif %}
Redirect
Returning the same template as in the get causes a slight problem. Hitting the refresh button will cause the browser to ask the user whether they want to resend the form data.
If we instead use a redirect, we can send the user back to the get version of the page, then we avoid this issue. To do so we need to import redirect and url_for from flask and use them to build the correct redirect path.

The advice given is to never try to figure out the correct url yourself, that’s what url_for is intended to do. As a parameter, pass the name of the method that responds to the URL, using an alias for the blueprint that is being used. This allows for changing URLs without having to change the code in a large number of places.
Since I am still using the function name hello from when I built the first test application, this appears to be an appropriate place to rename the function to index, mirroring the template that is behind the request. So the path to redirect to can be derived as follows:
return redirect(url_for('web.index'))
Redirection introduces another problem, however, as we no longer can place the nickname into the response; a new response will be created from the new get. We can resolve this by storing the nickname in a session variable:
session['nickname'] = form.name.data
The get function needs to change to load the variable from the session variable. If not found it will use None.
return render_template('index.html', form=form, nickname=session.get('nickname'))
The data from this is stored in a session variable, visible in the session cookie as shown in this screen grab:
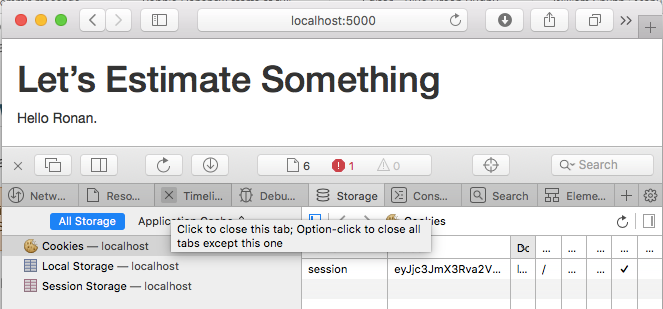
Note this data is not secure. While not human readable it can be easily decoded into the following JSON block, which also shows the token used for CSRF protection. For a great explanation of this see this blog and video on the insecurity of session cookies
{
    "csrf_token": "a1f522a1706d7fd22e0675655210b60f3419d77a",
    "nickname": "Ronan"
}
Note that at the moment the system has no means to delete the nickname; that can only be done by manually removing the cookie using the browser’s functionality or by starting a new session. That’s good enough for now.
What’s Next?
Next we will add some code to show any groups created with the nickname and allow them to add a new group.
