Flask and Docker
Getting an application from development servers into production can often be an afterthought for developers. Use Docker from early on to ease this step.

Getting an application from development servers into production via acceptance testing environments can often be an afterthought for developers. I want the Agile Estimator app to be built with hosting and deployment included from the start.
I need a way to deploy my application, possibly as part of a continuous delivery process, with changes committed being deployed automatically to production. Docker is a container management solution that can possibly help.
What are Containers?
One of the problems developers face is that having developed an application on their local machine, passed all the unit tests and also passed peer review, the damn thing doesn’t work when it’s deployed into a production like environment.
There are hundreds of things that can go wrong and it can be a nightmare trying to rule things out to find out what is different between one environment and the other. There are databases, OS patches, network configuration, software versions and many other factors to consider.
What if you could create the server (or more than one, say for a database and an application server) from source files included in your project that define exactly the conditions it needs to run. To deploy to any environment, replicate the conditions defined in the source.
Docker containers act like individual servers or groups of servers, specifically set up with repeatable instructions contained in code, that can act as the host for whatever you need, to create the application’s ecosystem.
Why use Containers?
The first thing that springs to mind is the speed at which you can get set up. Ever asked your operations team for a new server so that you can begin developing a new application, and it takes a week or longer to get it? All that is a thing of the past. Simply use a docker container and run it on you own machine. As you work, you will build up the instruction set that can be used for production.
Even better is that you could deploy you application to a Docker container in production. There might be additional setup required, for example, setting up secure secrets and passwords, but at least you can get started immediately. All your changes are tracked in the source control system, allowing anyone else to clone and run your application on their machine.
How Does it Work?
You define a Dockerfile that indicates the base image upone which you want to build and all the instructions that are required to set the container up.
For example you could create a Linux container based on Ubuntu, install Nginx and configure it along with an application or web page. In my case I will want to run the Python Flask application that I began in the Agile Estimator series of posts.
Once defined, you can build a Docker image using the Docker Client application. This sets up everything exactly as needed. When it’s ready to run, simply start it up with the correct ports open and it behaves as if it’s a new server.
Installing Docker Client
The first step is to create an account and download the installer for the free community edition at https://store.docker.com/editions/community/.
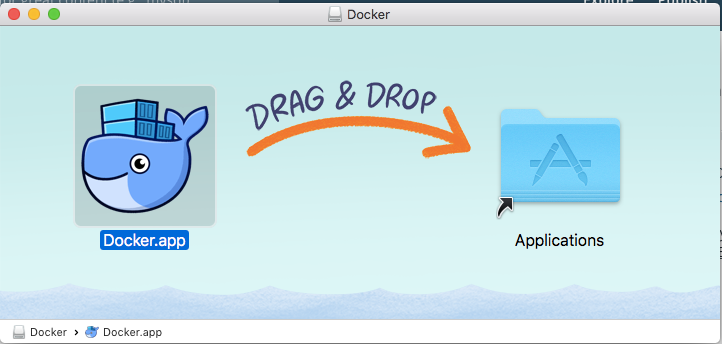
On Mac, double click on the Docker.dmg file and drag the resource into Applications.

When it has finished installing, start the application. Docker requires administrator access to run, so the next screen will prompt for your password.

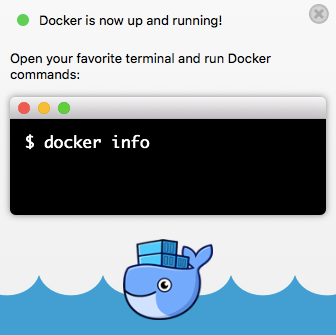
It takes a few minutes to get up and running. By default, docker is going to run every time you login to your computer, so it may be wise to disable this feature now to avoid this annoyance; this can be done from the preferences menu. Here is the screen you will see by clicking on the image, which on a Mac is on the top menu bar.

There are a few commands to run to try out Docker and to ensure everything is installed correctly. Docker displays a few suggestions you can try such as docker version or docker info. Here’s one that downloads the Hello World sample configuration, and tests that the installation is working.
$ docker run hello-world
Unable to find image 'hello-world:latest' locally
latest: Pulling from library/hello-world
d1725b59e92d: Pull complete
Digest: sha256:0add3ace90ecb4adbf7777e9aacf18357296e799f81cabc9fde470971e499788
Status: Downloaded newer image for hello-world:latest

Hello from Docker!
This message shows that your installation appears to be working correctly.

To generate this message, Docker took the following steps:
 1. The Docker client contacted the Docker daemon.
 2. The Docker daemon pulled the "hello-world" image from the Docker Hub.
    (amd64)
 3. The Docker daemon created a new container from that image which runs the
    executable that produces the output you are currently reading.
 4. The Docker daemon streamed that output to the Docker client, which sent it
    to your terminal.

To try something more ambitious, you can run an Ubuntu container with:
 $ docker run -it ubuntu bash

Share images, automate workflows, and more with a free Docker ID:
 https://hub.docker.com/

For more examples and ideas, visit:
 https://docs.docker.com/get-started/
The output proves that the installation is working and that it has shut down. You can simulate a bash shell on Ubuntu with docker run -it ubuntu bash which will download the required image, run it and give you shell access.
To see what docker files are running you can use docker ps but it will not show servers that have been shut down. Add the -a to see those.
$ docker ps
CONTAINER ID        IMAGE               COMMAND             CREATED             STATUS              PORTS               NAMES

$ docker ps -a
CONTAINER ID        IMAGE               COMMAND             CREATED             STATUS                      PORTS               NAMES
c9b37d913f62        ubuntu              "bash"              4 minutes ago       Exited (0) 33 seconds ago                       condescending_shaw
c377b9b9acb5        hello-world         "/hello"            16 minutes ago      Exited (0) 16 minutes ago                       jovial_sammet
Dockerfile
To build a container for this application using Docker, the next thing we need is a Dockerfile.
FROM python:3.6-slim

RUN mkdir /opt/estimator

WORKDIR /opt/estimator

ADD . .

RUN pip install -r prod_requirements.txt

EXPOSE 5000

ENV FLASK_APP=run.py

CMD ["flask", "run", "--host", "0.0.0.0"]
All Dockerfiles begin with a FROM command indicating the base image on which to build. The python:3.6-slim is a minimal version of Linux with Python installed.
You can run commands directly against the shell with RUN. Line 3 above creates a folder for our application in /opt/estimator. The WORKDIR command on line 5 sets the work directory for any remaining commands.
ADD copies all the files and subfolders across to the active working directory.
I have a requirements.txt file that I generated with pip freeze in my virtual environment, however, there appears to be more there than is necessary. For example, Pytest is not likely required running directly on the container. I could be wrong here and have to backtrack, but for now I created a simplified version of this file called prod_requirements.txt as follows:
Flask==1.0.2
Flask-Bootstrap==3.3.7.1
Line 9 of the Dockerfile runs the pip installer to ensure the required modules are available. The next step is to allow port 5000 to be accessible on the container using the EXPOSE command. This may evolve in the future, when I learn how to move the container into a hosted environment, but it suffices for development and testing puposes.
The last commands on lines 13 and 15 run the Flask application. Important to note the --host 0.0.0.0 parameter used which allows flask to accept connections that are not on the container. This allows me to test by opening a web browser on my computer to test the connection.
I’ve based this initial setup on the excellent course Essential Docker for Python Flask Development by Jorge Escobar which is available on Safari Books Online.
Another useful resource is the Dockerfile reference which explains the use of the various commands that appear in a Dockerfile.
Building and Running
With a Dockerfile and new production requirements created, we can now create and run the server. Open a terminal window and run the following to build the application, naming it the estimator-app image:
docker build -t estimator-app .
This should result in a successful build but the server is not running yet. To run as a background task (note the -d option for daemon) run the following command:
docker run -d -p 5000:5000 --name estimator-server estimator-app
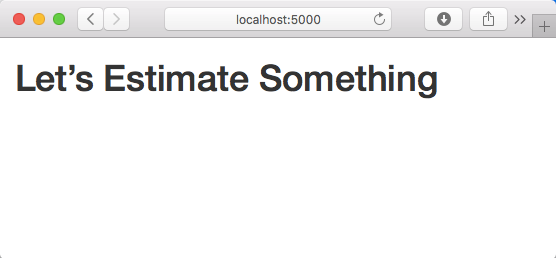
The -p 5000:5000 allows the port on your actual machine to be passed through to the docker server on the same 5000 port. We also want to give the server the name estimator-server, rather than be assigned two random words. This is now up and running and can be tested by using web browser on port 5000.

We can also use the Postman to test the Rest endpoints.
Listing and Removing Containers
To see running containers use the following command:
$ docker ps
CONTAINER ID        IMAGE               COMMAND                  CREATED             STATUS              PORTS                    NAMES
e73505da56a1        estimator-app       "flask run --host 0.…"   6 minutes ago       Up 6 minutes        0.0.0.0:5000->5000/tcp   estimator-server
We can also see servers that are no longer running by adding the -a option. Notice that since we did not specify a name for the ubuntu shell and hello-world containers, that they got two random words with an underscore separating them as unique names.
$ docker ps -a
CONTAINER ID        IMAGE               COMMAND                  CREATED             STATUS                    PORTS                    NAMES
e73505da56a1        estimator-app       "flask run --host 0.…"   7 minutes ago       Up 7 minutes              0.0.0.0:5000->5000/tcp   estimator-server
c9b37d913f62        ubuntu              "bash"                   20 hours ago        Exited (0) 20 hours ago                            condescending_shaw
c377b9b9acb5        hello-world         "/hello"                 20 hours ago        Exited (0) 20 hours ago                            jovial_sammet
Leaving the test containers lying around is probably a bad idea. They were only really necessary to show that the Docker Client application was installed correctly. They can be removed with docker rm <name>.
So that’s it for now. I will return to this Dockerfile as I learn more about what it can do, but at least I know that I can run my application on any server that can host a Docker container.
The code for this project is available on Github: https://github.com/rkie/estimator
