Cucumber for Behavioural Driven Development
Add behavioural test scenarios with Cucumber, written in the Given/When/Then style, to create human readable tests and living documentation.

Cucumber is a library that allows tests written in the behavioural driven development (BDD) style to be automated so that they run each time your project builds. This can be a great way for technical and non-technical people to see exactly what the code is doing on any given build. The test results act like a living documentation for every behaviour.
In this post, I'll describe the steps required to get up and running with some BDD tests in a project using Gradle and Kotlin, setting up the dependencies, adding a plugin, a feature test and getting it to run in IntelliJ. In the next post I will show how to get the tests to pass.
Add the Cucumber Dependencies
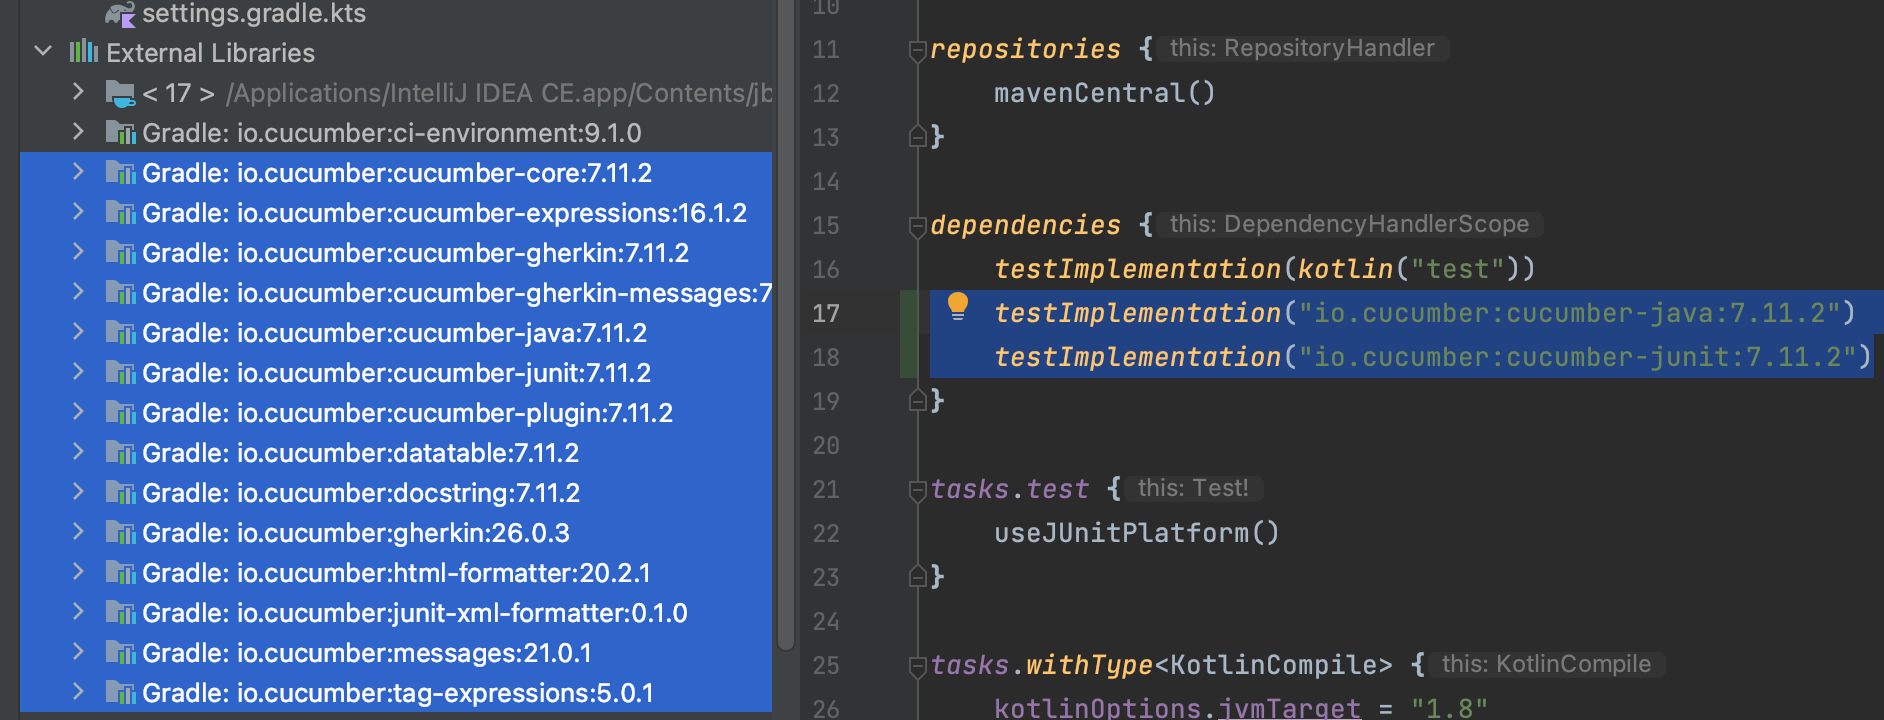
The Cucumber library is only needed during testing, so it is sufficient to add a testImplementation. You can check the latest version from Cucumber for JVM page and add it to the existing dependency section in the build.gradle.kts file. If you are using Maven or the Groovy style of build file, there are examples of how to add the dependency on the Cucumber website.
testImplementation("io.cucumber:cucumber-java:7.11.2")
testImplementation("io.cucumber:cucumber-junit:7.11.2")
IntelliJ spotted that the project is using Cucumber and suggests adding the Plug-in. This is going to a great help when working with Gherkin scripts later, but I'll show that in the next section rather than using the automatic action.
If IntelliJ does not begin to download the Cucumber dependencies immediately, you can force it to by going to the Gradle tool window (add this from the Tool Windows option on the View menu, if necessary), right clicking the project name and selecting “Reload Gradle Project”. The new dependencies should be visible under “External Libraries” in the Project View.

Install the Cucumber for JavaPlug-in
Lets install the “Cucumber for Java” plug-in within IntelliJ. You don't have to install this plug-in, but it does make working with feature and step definition files a little easier. It adds syntax highlighting and automatic formatting, but also adds a new run configuration option to allow running all or individual BDD tests in the project, so can be quite useful.
You can find and install the plugin from the IntelliJ preferences menu under Plugins. Under the Marketplace tab, search for Cucumber and select the install option on Cucumber for Java. A restart may be required.

Add a Feature
Gherkin allows breaking tests down in to features, scenarios and steps. You can collect multiple scenarios relating to a particular feature into the same file to aid organising them. Each scenario has a number of steps to complete, each mapping to one of the Given, When and Then statements in the behavioural test description.
From Cucumber version 6, there is also support for another level of grouping called a Rule. This collects several scenarios together as a business rule, with a feature being comprised of one or more rules if needed. Since we are going to keep it simple for this example, I will leave out the rule for now.
I want to create a few scenarios to test the behaviour of the simple helloworld application that I described in Testing Side Effects. This prints “Hello World” when no arguments are passed. It replaces “World” with the first argument when it is passed to the program at runtime.
Scenarios can be added by creating a .feature file on the class path. I've seen these placed in various places, but the recommended location is now under the resources/ folder in the project, usually in a folder with the same name as the package that is being tested. Add the following file, resources\test-cucumber.feature:
Feature: Test Cucumber

  Scenario: Should print "Hello World!" to the screen when the program is run without specifying a name
    Given the helloworld application
    When the application is run with no arguments
    Then "Hello World!" is output to the console

  Scenario: Should print "Hello Dave!" to the screen when the program is run passing name=Dave
    Given the helloworld application
    When the application is run with argument "Dave"
    Then "Hello Dave!" is output to the console
The Cucumber for Java plugin recognises that these scenarios and steps have not been created yet and feedback on screen shows that they won't be recognised when running the test. Let's run the tests anyway.
Create a Configuration and Run the Test
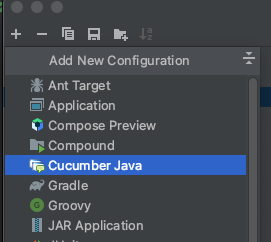
Add a new run configuration by selecting “Edit Configurations” from the “Run” menu. Select the plus icon and find “Cucumber Java” from the list. Give it a recognisable name. A few things need to be configured before we can run the tests.

Cucumber tests run by executing the Cucumber CLI. You need to point to where this is. Under “Main class” field, enter io.cucumber.core.cli.Main. Older versions used a different path, so perhaps this option maintains backwards compatibility for older projects.
Also required is to point Cucumber at the location of the feature files. Under “Feature or folder path”, enter src/test/resources.
Finally, we need to let IntelliJ know where to find the main class mentioned above. Because we specified that Cucumber would be a test dependency, it will not be available as part of the build for this module. Under “Use classpath or module”, select the option with your project name with .test at the end.
Now we are ready to run the Cucumber CLI to see if it scans our feature file. It should report some errors, as we have not added any code to bind the steps from the feature file to actual working code.
Note that the output can be noisy. As is suggested, you can mute this by adding a line cucumber.publish.quiet=true to a new file, src/test/resources/cucumber.properties. The errors that are left indicate that there are some undefined scenarios.
What's Next?
Looking at the output from the Cucumber test run, you can see that it gives some helpful output indicating what code it expects to see.
@Given("the helloworld application")
public void the_helloworld_application() {
    // Write code here that turns the phrase above into concrete actions
    throw new io.cucumber.java.PendingException();
}

@When("the application is run with no arguments")
public void the_application_is_run_with_no_arguments() {
    // Write code here that turns the phrase above into concrete actions
    throw new io.cucumber.java.PendingException();
}

@Then("{string} is output to the console")
public void the_is_output_to_the_console(String string) {
    // Write code here that turns the phrase above into concrete actions
    throw new io.cucumber.java.PendingException();
}

@When("the application is run with argument {string}")
public void the_application_is_run_with_argument(String string) {
    // Write code here that turns the phrase above into concrete actions
    throw new io.cucumber.java.PendingException();
}
The output shows which steps have not been defined. We have not written the code to bind any of the statements to the application yet so all appear here. This output can be useful to alert us when something is still misconfigured. It has correctly interpreted the quoted strings in our feature to be variables that can be verified in code.
Next time I will continue adding Cucumber to our project by adding the bindings using the code from the output above. Although the output is Java code and the application itself is Kotlin, we can still make use of the provided code.
