Adding a Tag to AWS Hosted Zone
Tags are a way to add meta data to the AWS resources you create. One possible use for these are to divide the costs related to different projects.

Tags are a way to add meta data to the AWS resources you create. One possible use for these are to divide the costs related to different projects.
While it was easy to add tags to both S3 and CloudFront resources, I found this option more difficult to find for Route 53. Rather than spend time looking in vain, I decided to see how this can be done using the AWS Command Line Interface (CLI).
Note that it is possible to do it through the web console, but before I found this option I had already created it another way. See below for details of both approaches.
Command Line Interface
If you have not already set up your CLI, you can find instructions on what is required in this post which covers getting access keys, initial configuration and the basic command structure: AWS Command Line Interface and S3
First thing to do is to make sure that you can see the hosted zone that you created with the following command:
aws route53 list-hosted-zones
Assuming that there is a hosted zone created for the account on Route 53, this will give back a piece JSON (if that is how you configured the CLI to respond) that describes each zone. Within this there will be a Name, Id and some additional data.
To see what tags have been applied to a hosted zone enter the following command, replacing the Id with your own
aws route53 list-tags-for-resource --resource-type hostedzone --resource-id <Id>
Again you should get some JSON back from the CLI. In it there should be a Tags field. By default this will be empty.
"Tags": []
The command required to add a tag is change-tags-for-resource and can also change or delete tags. The tag can be specified in JSON format or as a key-value pair. To add a tag I will use the following, substituting my hosted zone’s Id into the command.
aws route53 change-tags-for-resource --resource-type hostedzone --resource-id <Id> --add-tags Key=organisation,Value=Clareville
There is no output from the command, but rerunnning the list command above now reveals the tag in the output:
"Tags": [
    {
        "Key": "organisation",
        "Value": "Clareville"
    }
]
Tag Editor
Only after adding the tag through the CLI did I discover where to view and add tags within the Route 53 web console. These are accessed via the Tag Editor.
From the Route 53 dashboard, select hosted zones. Rather than click on the name-link of the hosted zone, instead select the radio button to the left. This pops up a panel on the right side of the window. At the bottom of this is the link to access the Tag Editor.

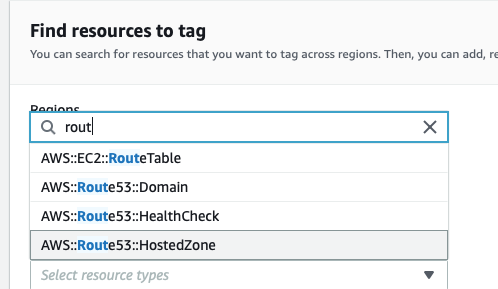
By select the AWS::Route53::HostedZone option from the Resource Types box you should be able to find the hosted zone.

Next click the check box for the hosted zone and click the ”Manage tags of selected resources” button. This allows tags to be added, changed and removed for a collection of resources at once.
This does not feel as easy to use as tag editors in other parts of AWS. For example S3 and CloudFront make it much easier to access this feature.
Tag Use
If you have multiple clients that you manage web resources for, or have different departments that you want to bill separately then tags can help organise this.
Access to the billing data is only available through the root account by default. There are a number of steps to go through to grant access to other users, documented here.
To make use of any tags you have created you need to activate them first. Log into the AWS Console as a user that has access to the billing console. Select Billing from the services menu.
Select “Cost allocation tags” from the left navigation pane. Listed on this screen are any tags that you have created. If you want to, you can use this screen to activate the tags for use in creating reports.
Note that there is a small fee due each time that a report is run.
